Table of Contents
ToggleWhat is Adobe After Effects used for?
AE stands for Adobe After Effects. AE is used for Motion Graphics, 2D and 2.5D Animations, Visual Effects, Compositing, Match moving, Video Games, film making in post-production. This Software is mostly used for television, short films, music videos etc. Some common tools which everyone should know are composition panel, Masking, keyframes, Tracking, keying, Pen tool, Roto Brush, Null object, Parenting, Precompose layers, render setting , 3d layers, camera, light, presets and many more.
Adobe After Effects is layer based software know what is Layer based? For example if you want to create new art work or other thing in Ae so for every new work you need to take a Fresh New layer so that later we can directly change it as per our work requirement. So it is Non-destructive workflow means we can change anything at any time.
After Effects supports many plugins like Element 3d, Mocha pro, Trapcode particular by using these plugins we can create anything which is not possible inside Adobe after effects. If you want to run after effects so you will need a good Desktop or Laptop.
Basic of After Effects
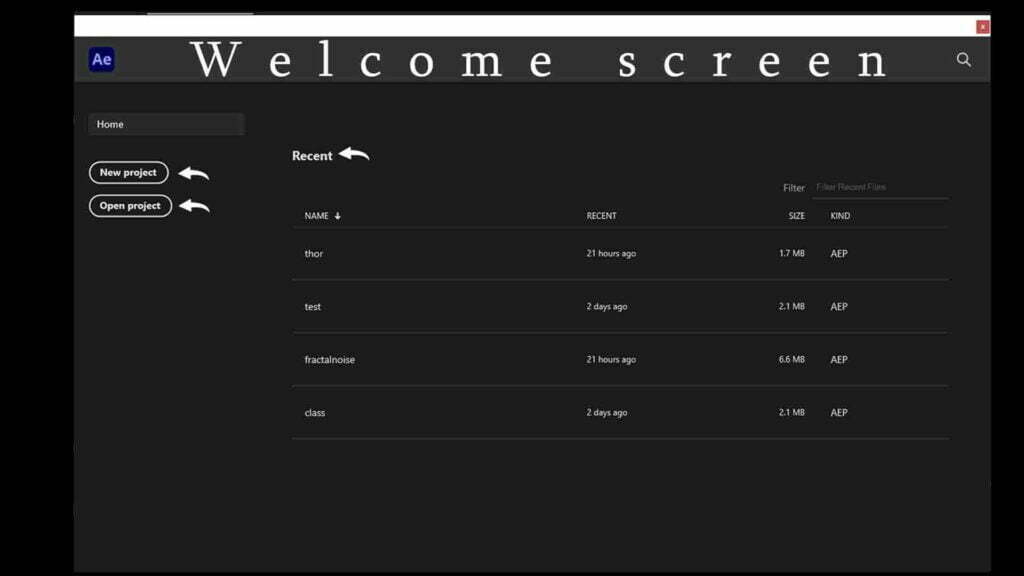
1. The first window that We’re going to see is Welcome screen and besides being
friendly and saying hi to us it also has another function and that is creating
a new project or opening up an existing one here on left you can see two
buttons for that new project and opening up an existing one and in the middle
panel we see the recent project that we worked on this makes it easy to
continue on a project where we left off for now let’s click the new project
button dive straight into Adobe After Effects.
Welcome Screen
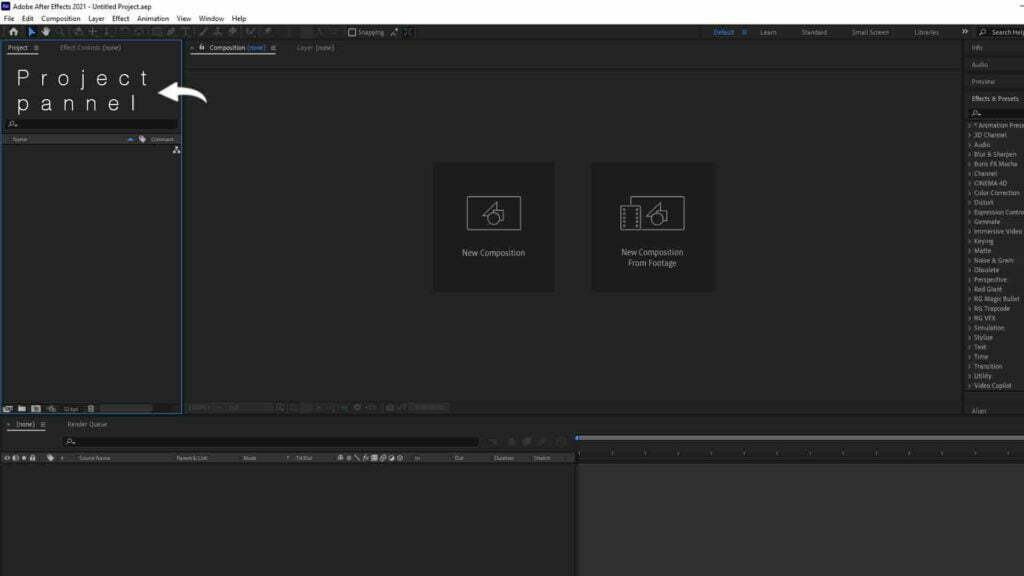
2. The First Thing we will see a blank canvas consisting out of different panels or windows everything of course starts project panel on the left in this panel. we can place and find all of our footage compositions assets and more.
Project Pannel
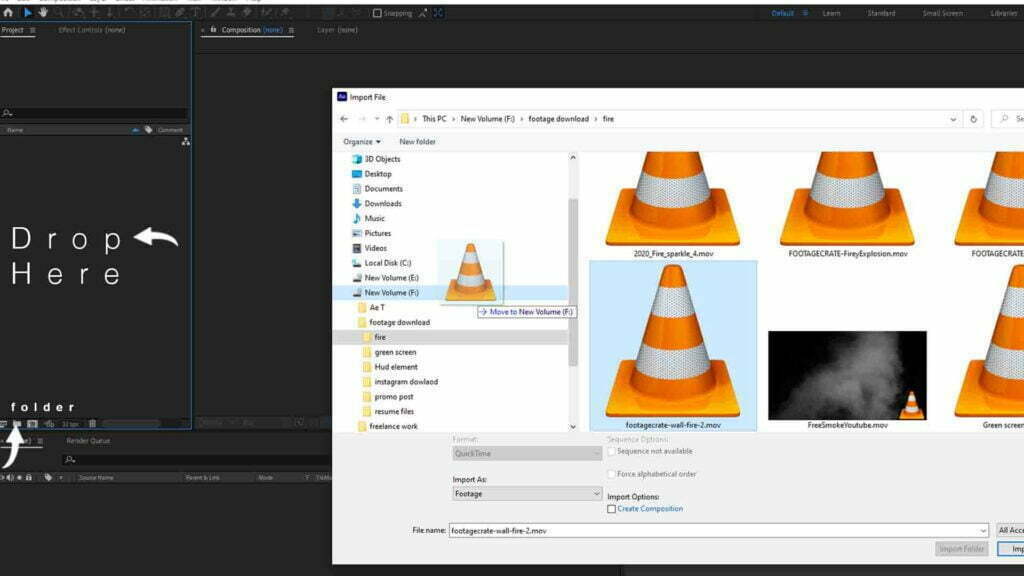
3. We can import footage in different ways but the methods that we use the most are simply by dragging the footage into the projects panel or you can also just double click in the panel itself which will prompt an import window where you can search for your footage now on the bottom of the project panel there’s a button to create a folder helping us to keep everything organized and if you want to change the name of a clip you can’t just double click on it you have to use the return key on your keyboard to make a name change.
Drop Here
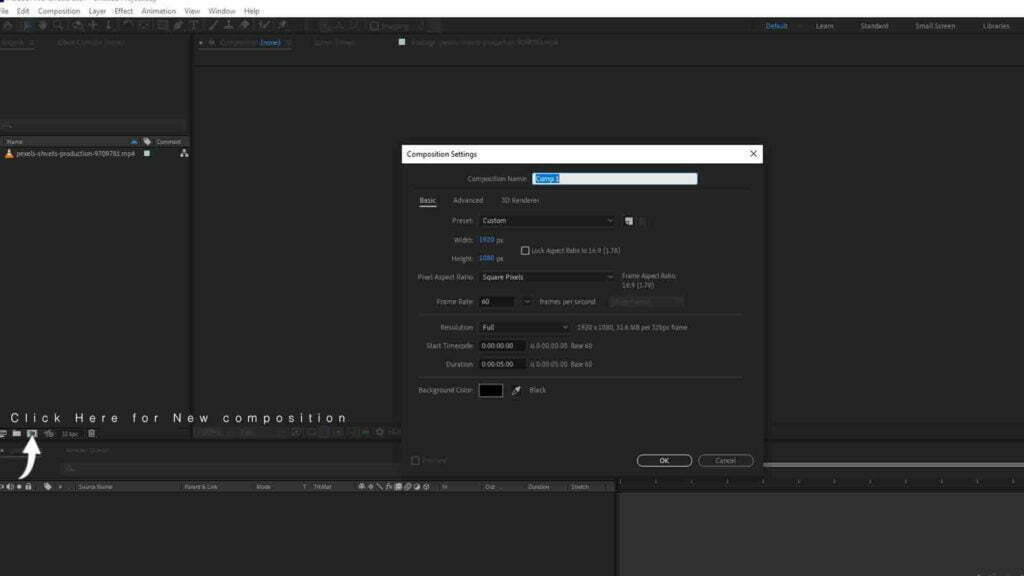
- Now that we have organized the project we need a timeline to work in and for After Effects this called a Composition and by clicking this button right here we can create one of those new compositions and it will open up a settings window and choose all the settings that we want for the timeline or in other words the composition now first let’s give it a name right here on top then we have the main settings like the resolution and all you can choose out of a dozen preset for this or you can create a custom one that is up to you. One more thing is the length of the composition and this is totally different from Adobe Premiere Pro where you have an endless timeline and after effects. You have to determine the length of your workspace in advance however you can always change this later on if your composition is too short or too long so let’s hit Ok.
Create New Composition
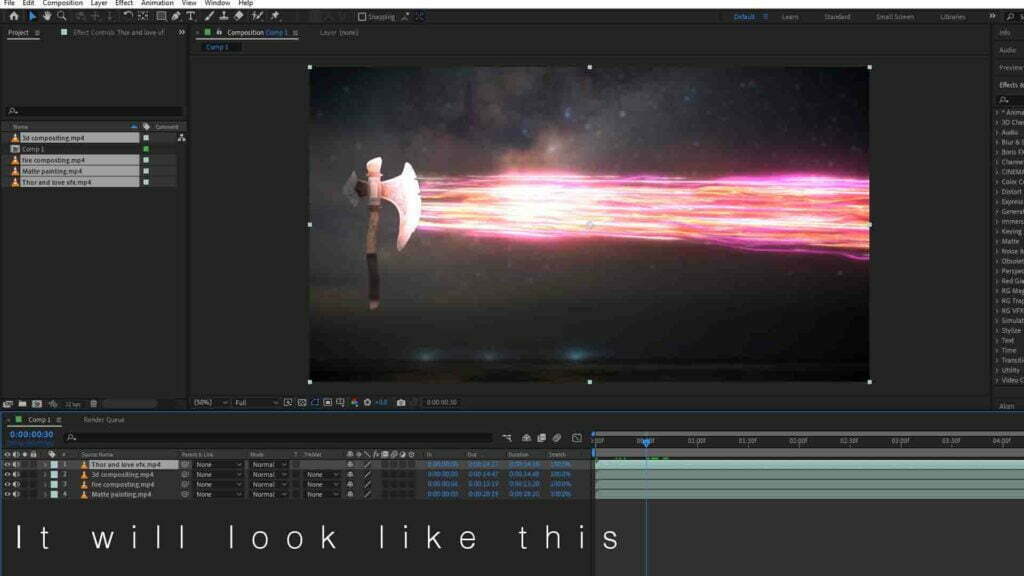
- Start adding some footage in here
let’s take those imported clips and drag those it to the composition or
timeline the first thing that you will notice now is how small layers look
completely different form Premiere pro and other editing software and this
because after effects works with layers and you’re quickly goanna have a lot of
them.
Drop Video Here

Final Composition
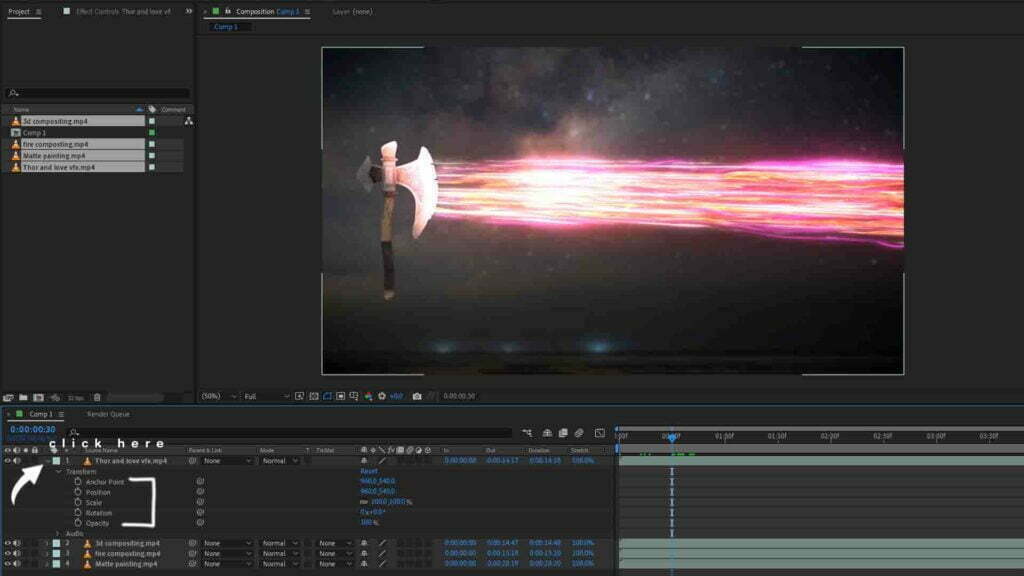
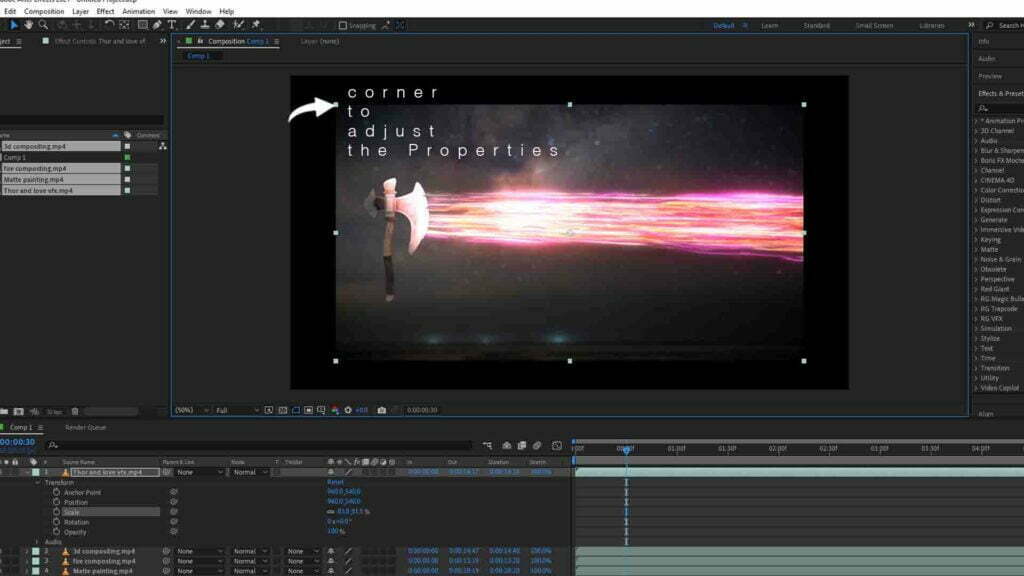
- On the left bottom side of each layer in the comp you can see this Arrow from which we can expand their properties like Position, Scale, Rotation, Opacity and many more. We can change these adjust the Position scale and so one for that layer now such adjustments can also be done visually in the composition viewport with the layer selected you can take any corner to adjust the scale or just grab the clip in the middle to change its position however if you want to rotate it through the layer controls you have to use the rotate tool which you can find in the top toolbar right there so selecting that tool now allows you to rotate the clip also we can find many other tools in Top part of the Adobe After Effects.
Transform properties
Corner to adjust
Effects and Preset
- In the right Side we have different tabs but the way that we want is the Effects and Preset tab this right here is your effects library now we can look for something through the entire library or just use the search bar if you already know the effect you’re looking for.
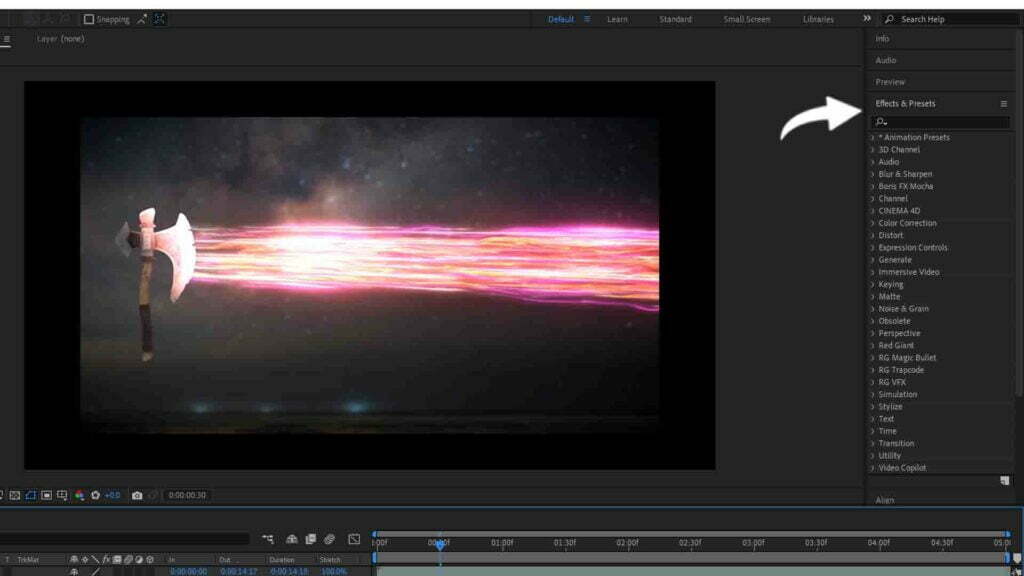
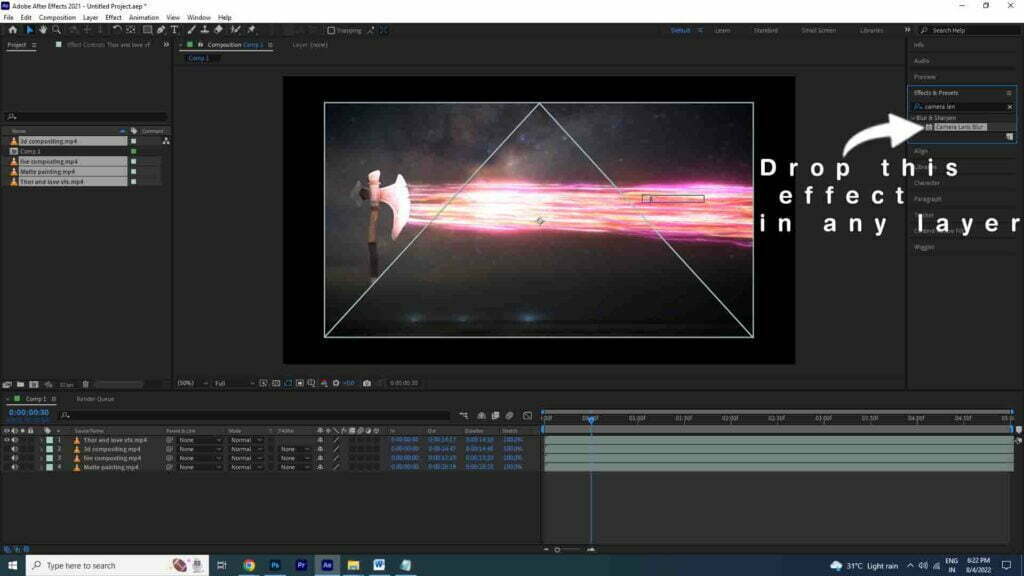
8. Let’s search for Camera lens blur and then just take that effect and drag it to the desired layer.
Drop this Effect
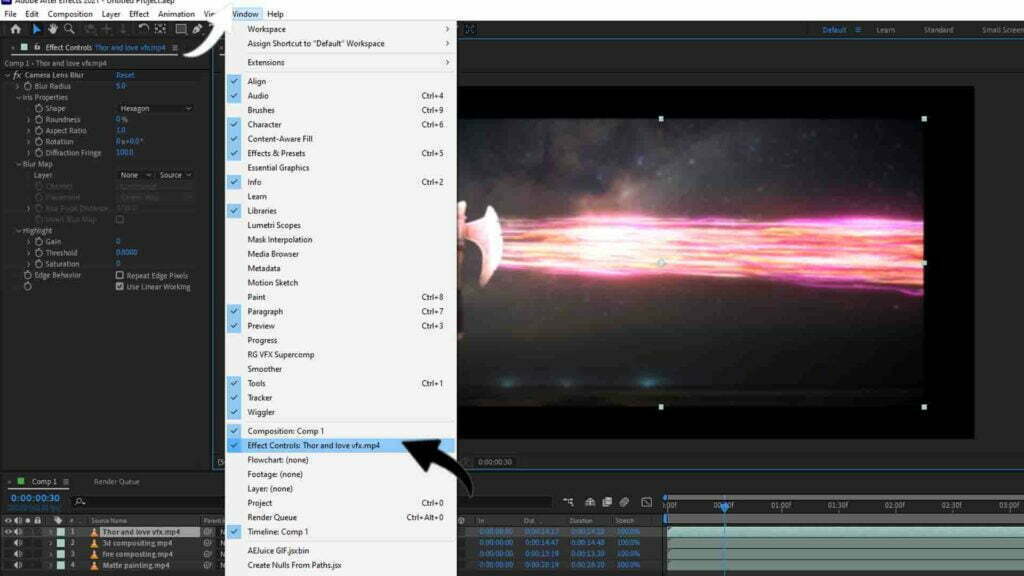
- And once you added the effects a new panel will open up called Effects Control panel.
Effect Control
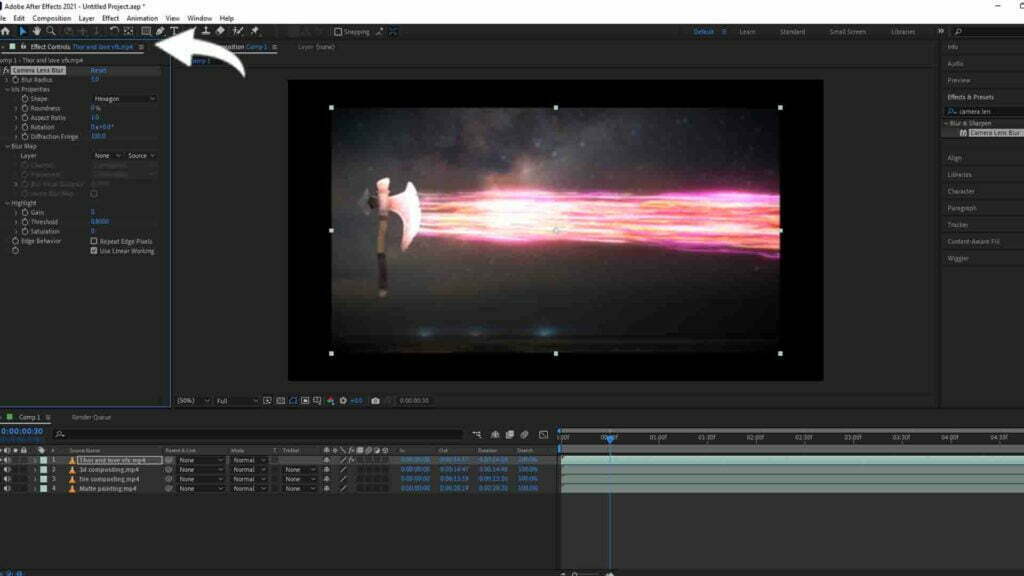
- For some reason this panel does not appear or any other panel simply go to the top menu window and choose effects controls from this list now in this panel we can adjust the settings of the camera lens blur or any other effect that we applied to the selected clip it’s easy as by the way we can find the same settings backed by expanding the layer so you’ll have two places where you can change that now. This is some of the basic interface and tools of Adobe After Effects.