Masking is one of the Essential tools in Adobe after Effects. This tool helps you in many ways like to create Transitions, Motion Graphics, Rotoscopy and are the basic of Visual Effects and compositing work in after effects.
What's a mask? How does it Work
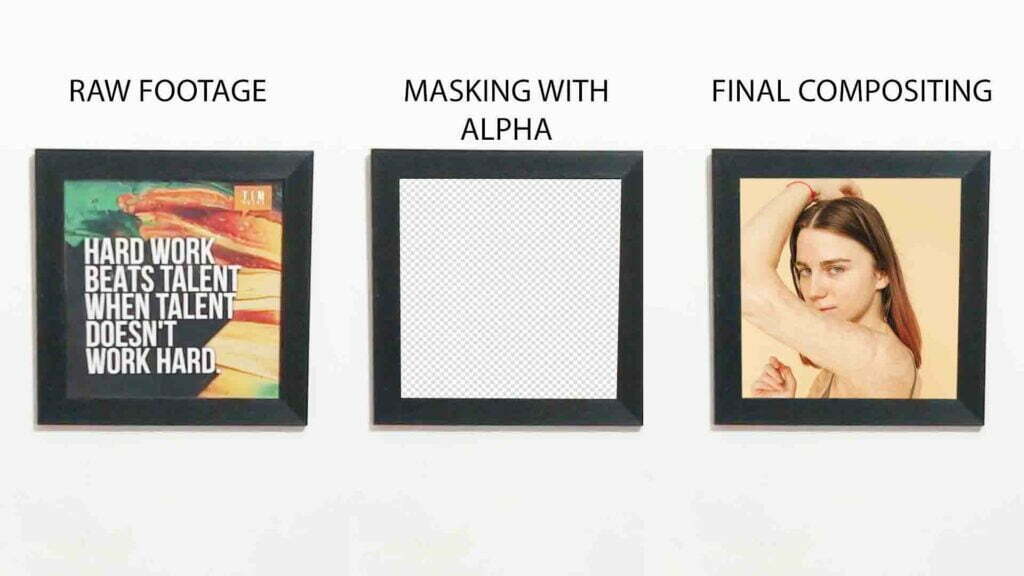
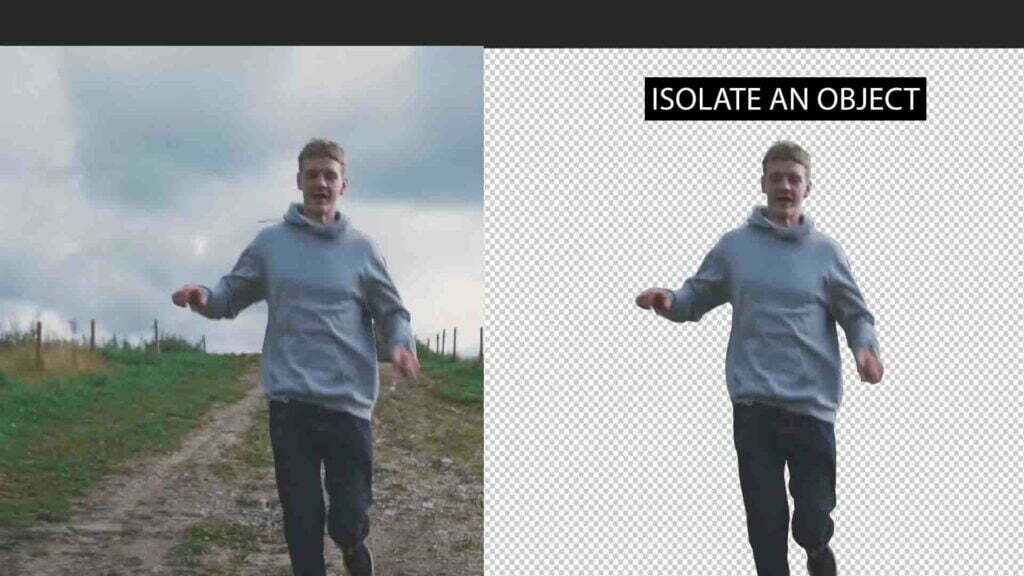
- Masking allows you to cut out image or video and combine with different footage together. We can Create Masking through Pen Tool, Shapes and track matte also. Masks in after effects allow you to determine the visibility of specific parts of a layer. This Feature is similar like in Photoshop mask and illustrator mask if you use these 2 applications or any photo editing app.
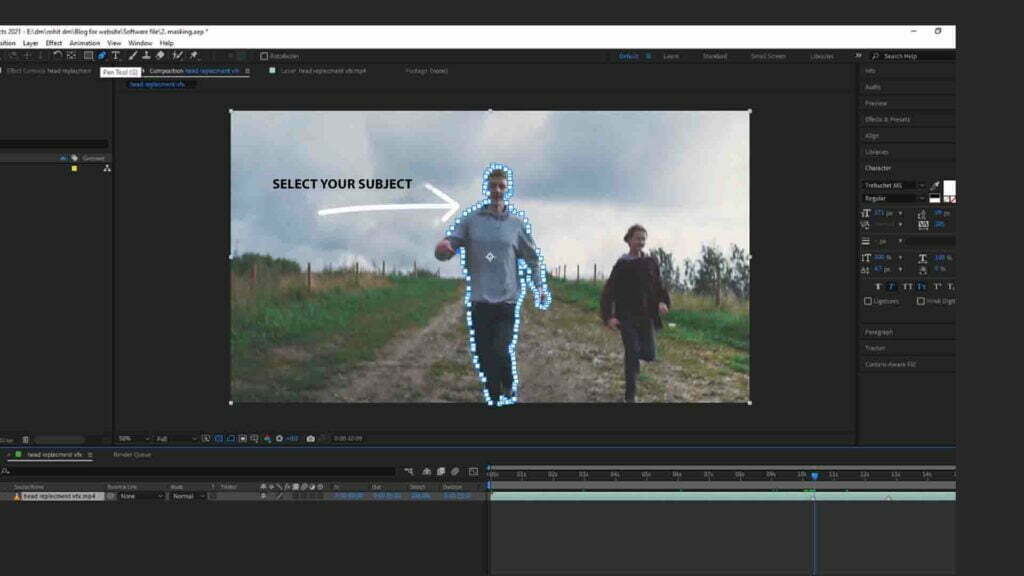
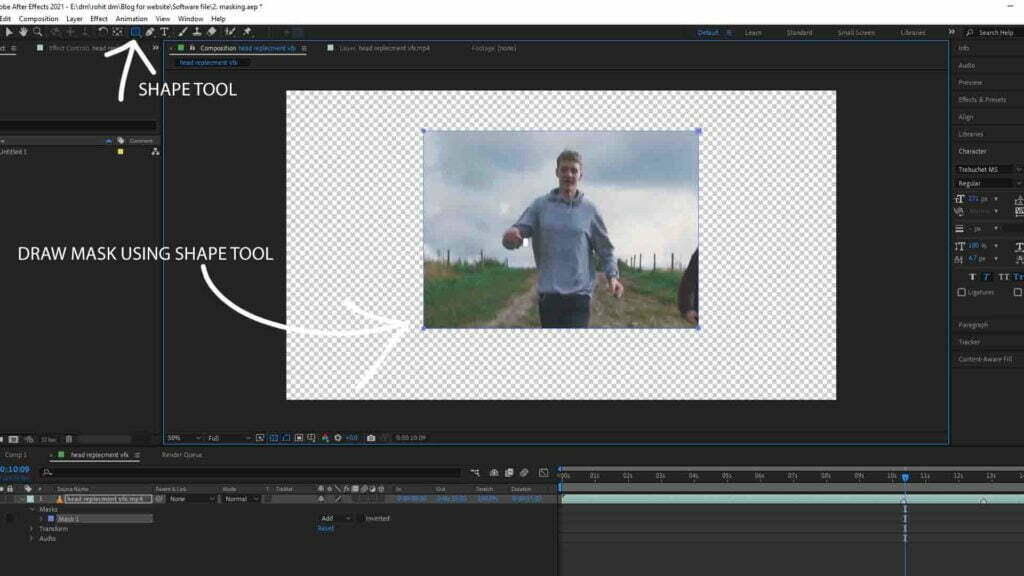
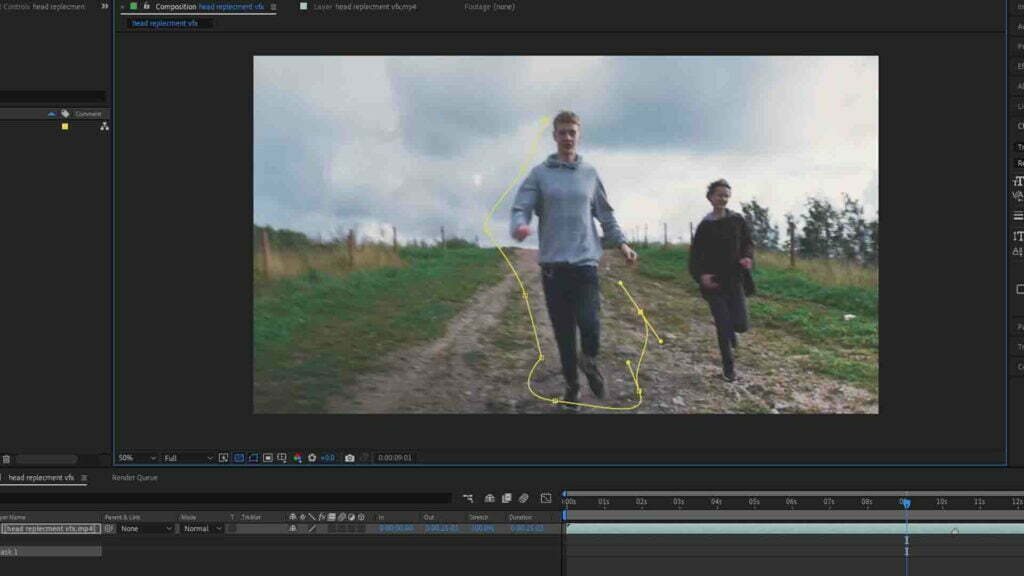
2. If you want to create a mask so firstly you need to select that layer in layer panel then grab pen tool or shape tool as per your requirement. Let’s create mask and therefore we go to pen tool icon at the top bar menu or we can press G on your keyboard. There are some more option in pen tool your need to click on pen tool and hold it for a second then it show you some more options like for adding subtracting and modifying press G repeatedly will cycle through these different modes.
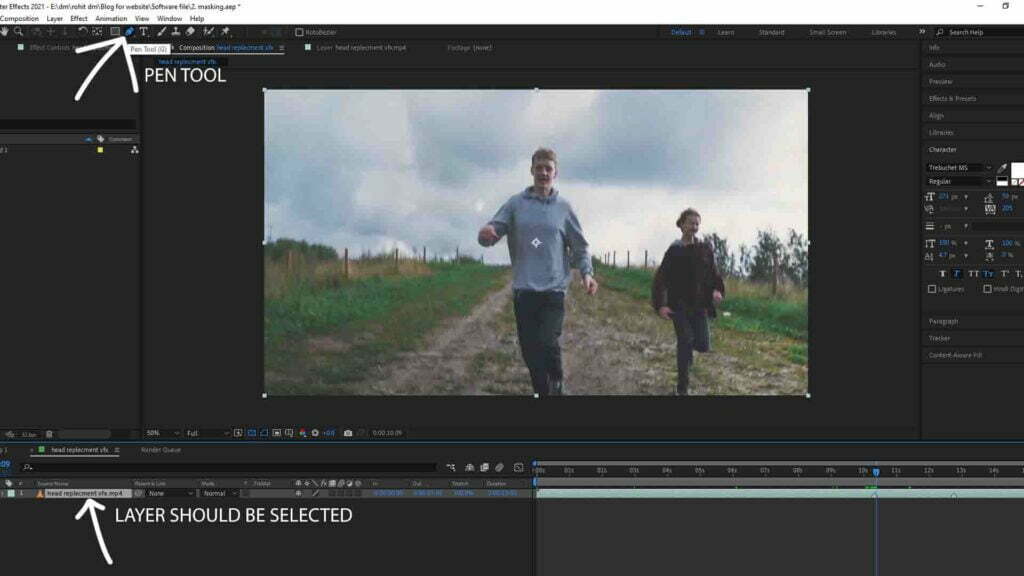
3. And then create mask around your subject or footage but make sure the layer should be selected otherwise it will create a shape layer that is a different topic. When you draw path and close path you will get alpha channel and you can composite with different image or video and don’t forget to close the path of the shape otherwise it will not work properly.
4. After drawing the shape around the subject, subject separate from the main footage and you can place or composite image and video behind the subject called compositing.
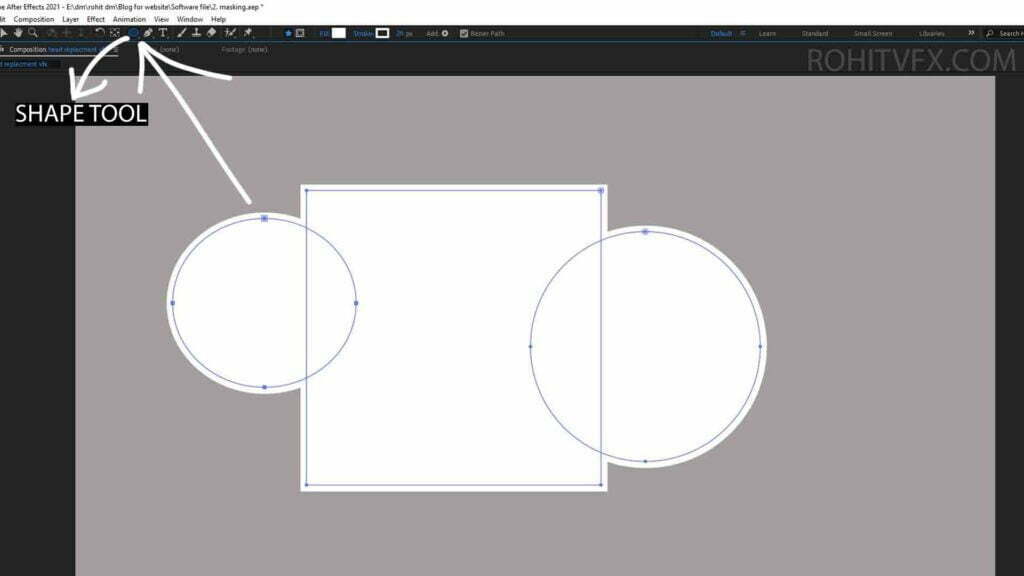
5. We also have some other tool to cut out a mask if you go over next to the pen tool the rectangle tool. We have multiple tools in shape tool like Rectangle tool, Rounded rectangle tool, Ellipse tool, Polygon tool, star tool simply create masks in these specific shapes.
Some useful shortcut which helps you while doing your work. If you draw mask through shapes you can see your mask will draw from the top left corner side. if you’re creating a rectangle or ellipse shape by holding down control the mask will be centered around your mouse if you add the shift button to that will keep all the sides equal and allowing you to make perfect square or circles.
and by holding down the space bar while creating the mask you can also position it while creating it.
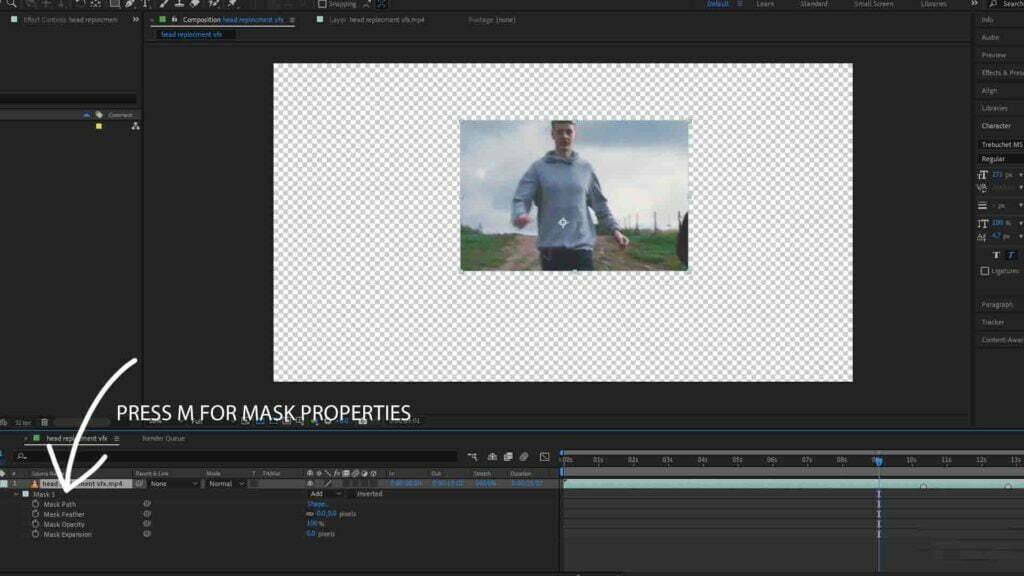
- let’s hit m twice and you will see its properties to reveal it on the timeline the first option or property you’ll see on the mask is the mode which determines what the mask actually does. you can control all the mask property from there, like feather the mask and keyframe to mask path bring down the opacity and play with the expansion which will make it bigger and or smaller as we can see all these properties is key frameable. when you are working with a mask but still need to be able to see the rest of the layer. We can set these modes as we drawing the mask by pressing the corresponding key before releasing your mouse click.
N – None
A – Add
S – Subtract
I – Intersect
D – Darken
F- Difference
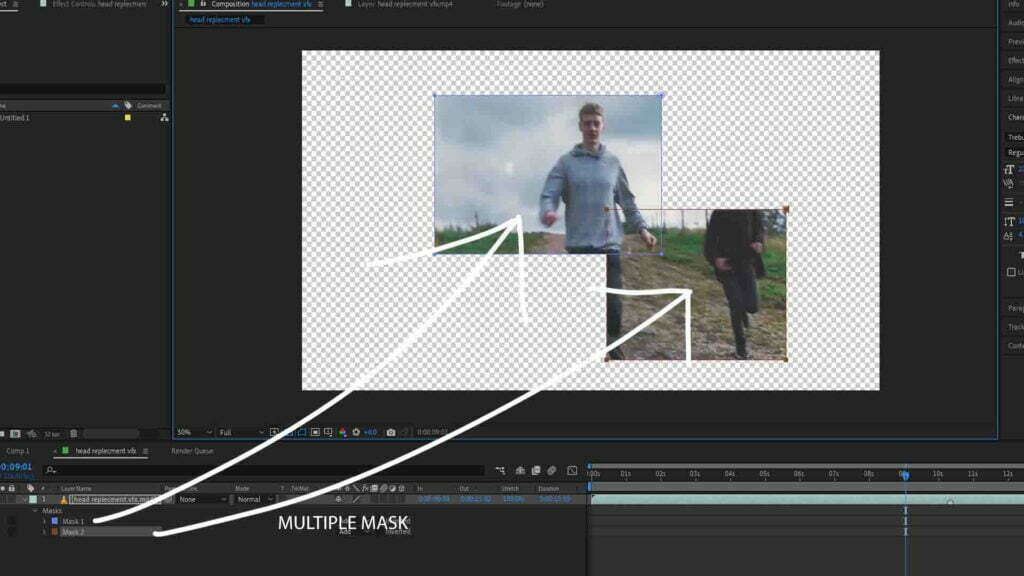
6. If a draw second mask on in the same selected layer notice after effects adds a new mask right here in the timeline show as mask2 and again draw mask will add mask3 and so on. We can also rename by any mask clicking on the name and pressing enter, also change the color of mask in the left side of name by simply click on the small box.
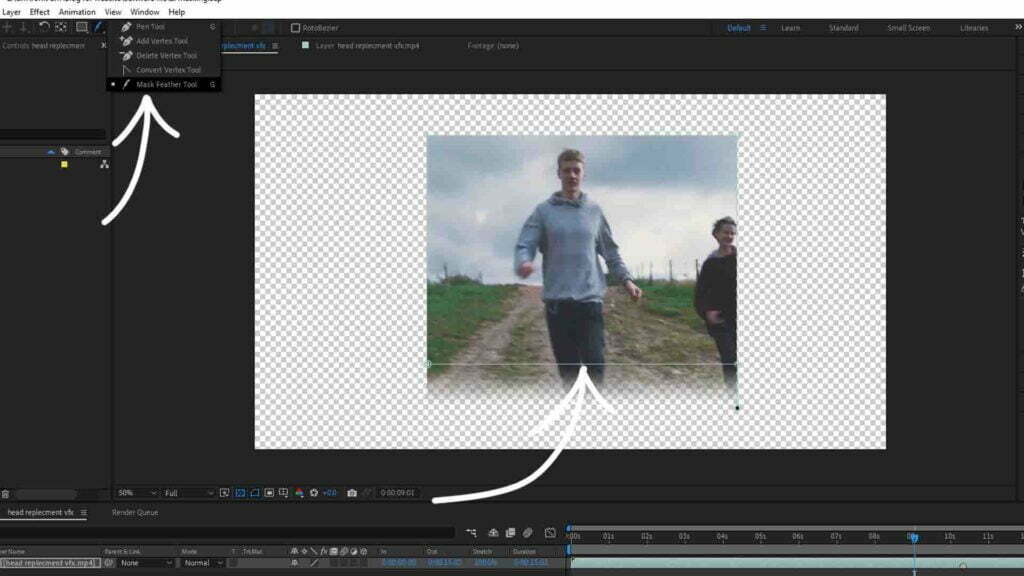
7. If you need to get specific feather on the mask corner there’s mask feathering tool in pen tool option that allows you to finesse this as much you like.
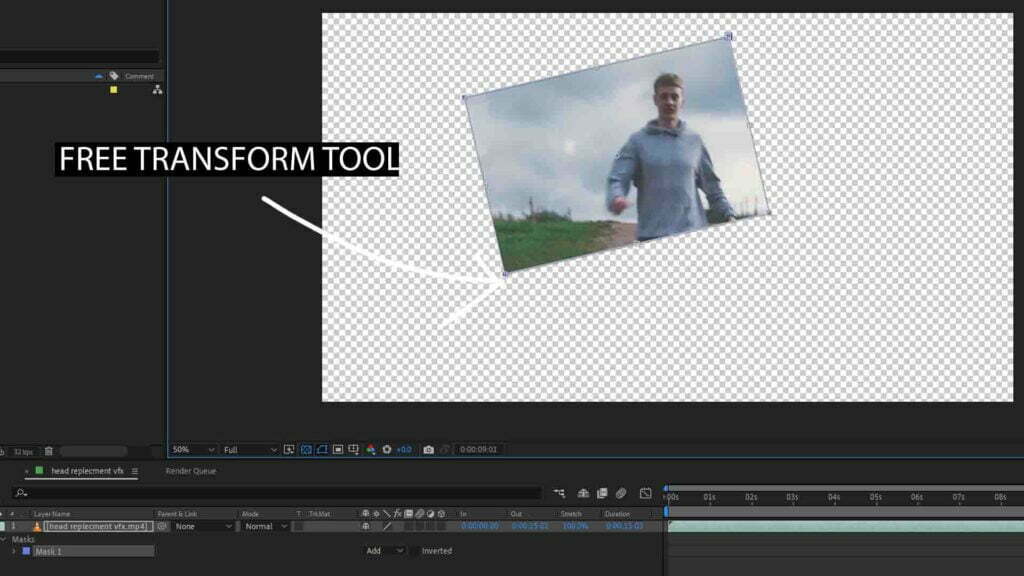
8. for the mask free transform double click on the mask path and you can move it around or scale it to close that out double click again directly on the path any anywhere outside of it.
9. You can also selected the individual point called vertexes. Just Deselect mask only select layer and then click to any single point or vertex and then manipulate points at once or you can either hold shift and select more points. We can also animate our mask by simply adding some keyframes on mask path property.
10. One important note if you don’t select the footage and create the mask it will create shape not the mask also called shape layer.